Try Out RDK7
Overview
This guide provides step-by-step instructions for bringing up RDK using a Raspberry Pi as the target device. The document covers the necessary hardware & build setup, build instructions, and detailed flashing instructions to get your Raspberry Pi ready to run the RDK software.
The RDK port for Raspberry Pi makes the RDK software stack available on a popular hardware device. Raspberry Pi (RPI) for RDK-V supports Dunfell builds. A variety of images based on requirements can be built for RPI, such as Media Client and IP Client STB.
Build Instructions
Build Requirements: Setting up the Host Environment
| Requirement | Yocto 4.0 (Kirkstone) | ||||||||||||
|---|---|---|---|---|---|---|---|---|---|---|---|---|---|
| Linux | 64 bit Ubuntu 20.04 LTSShell BASH
https://docs.yoctoproject.org/kirkstone/ref-manual/system-requirements.html |
||||||||||||
| Free HDD Space |
|
||||||||||||
| Host Tools Versions | Git 1.8.3.1 or greatertar 1.28 or greater
Python 3.9.0 or greater gcc 10.1 or greater GNU make 4.0 or greater |
||||||||||||
| Raspberry Pi development kit | RPI4 |
Ensure that python exists in /usr/bin/python. If not, create a softlink for /usr/bin/python to python executable.
$ which python
(should give)
/usr/bin/python
Install the following packages for setting up your host VM before building an image
The instructions provided below are meant to be executed via the command line on an Ubuntu machine.
# essential package installation
# super user mode is required
# major essential packages
sudo apt install ant build-essential chrpath cmake curl diffstat fd g++ g++-multilib gcc gcc-multilib \
git git-flow git-man jq libbz2-dev libffi-dev libglib2.0-dev libldap2-dev liblzma-dev libncurses5-dev \
libreadline-dev libsasl2-dev libsqlite3-dev libslang2-dev libssl-dev libxml2-dev libxmlsec1-dev \
llvm make nnn python3.8 ripgrep sysstat texinfo tk-dev tree wget \
xz-utils zip zlib1g-dev zstd
You also need to ensure you have the en_US.UTF-8 locale enabled:
locale --all-locales | grep en_US.utf8
Configure repo
In order to use Yocto build system, first you need to make sure that repo is properly installed on the machine:
# create a bin directory
mkdir ~/bin
export PATH=~/bin:$PATH
# Download the repo tool and ensure that it is executable
curl http://commondatastorage.googleapis.com/git-repo-downloads/repo > ~/bin/repo
chmod a+x ~/bin/repo
Note: It is also recommended to put credentials in .netrc when interacting with the repo. A sample .netrc file is illustrated below.
# RDK Central Gerrit
machine code.rdkcentral.com
login <RDK Central SSO email address>
password <PAT>
# RDK Central Github
machine github.com
login <Public GitHub UserID>
password <PAT>
Creating your Personal Access Tokens – PAT
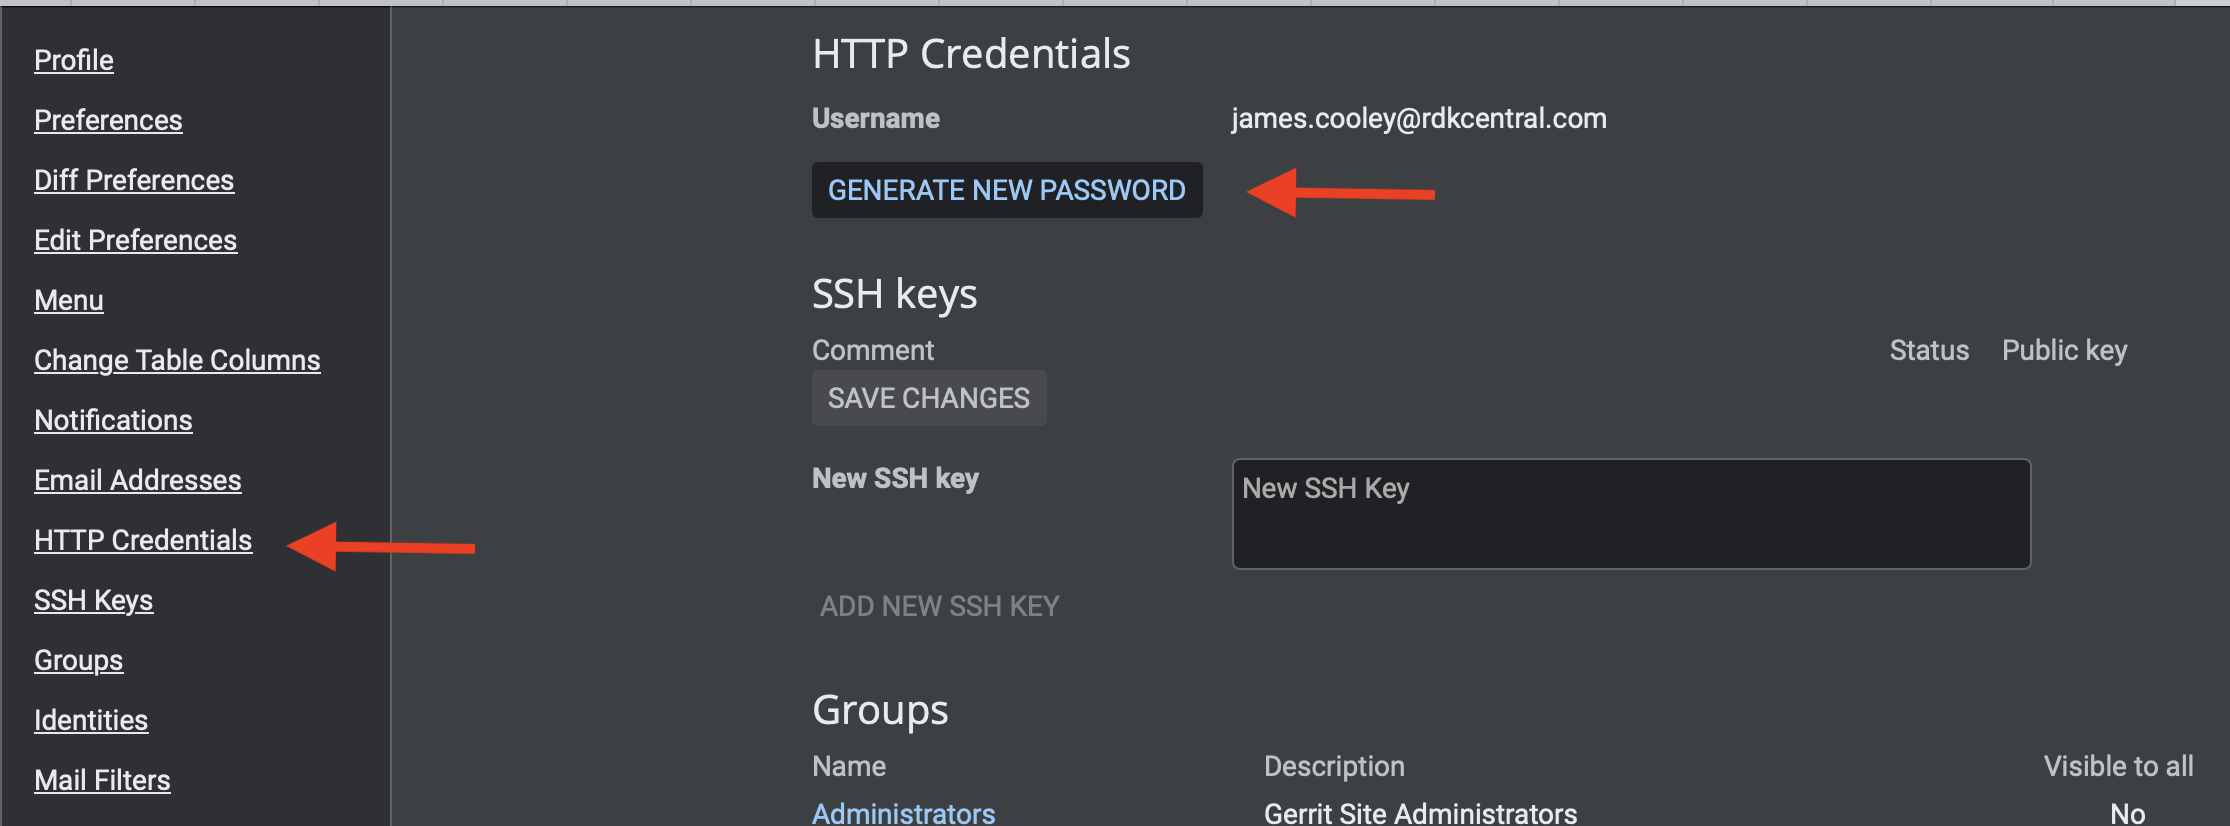
Gerrit:
Set your Gerrit PAT here: https://code.rdkcentral.com/r/settings/#HTTPCredentials
Github:
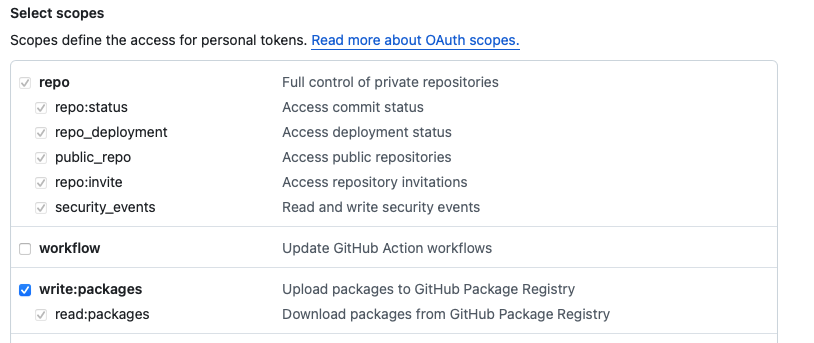
For GitHub to create a PAT navigate to Settings – Developer Settings – Personal access tokens – Tokens (classic)
- https://github.com/settings/profile ← click on “Developer settings” here
Note: for git actions (clone/push/pr) you need to select at least the following scopes:
- repo
- write:packages
Build Steps
The following steps tell how to build each of the required layers and finally generate a full stack image by building the image assembler layer.
Note: Each layer depends on the IPK’s generated by the previous layer. The IPK paths given are examples only; the actual path will depend on how you store your IPK’s.
Step 1. Building the OSS (open-source) Layer
$ repo init -u "https://github.com/rdkcentral/rdke-oss-manifest/" -b refs/tags/4.6.2-community -m rdk-arm.xml
$ repo sync
$ MACHINE=rdk-arm64 source ./scripts/setup-environment
$ bitbake lib32-packagegroup-oss-layer

# This produces IPK objects that can be packaged into the OSS IPK feed:
# The OSS IPK feed is located in `build-rdk-arm64/tmp/deploy/ipk/rdk-arm64-oss/`

1. Locate the `opkg-make-index` utility that is part of the native built components.
   For OSS layer, this should be located in `build-rdk-arm64/tmp/work/x86_64-linux/opkg-utils-native/0.5.0-r0/git/opkg-make-index`

2. Run the opkg-make-index utility to create the IPK Package index:
   $ ./build-rdk-arm64/tmp/work/x86_64-linux/opkg-utils-native/0.5.0-r0/git/opkg-make-index ./build-rdk-arm64/tmp/deploy/ipk/rdk-arm64-oss/ > ./build-rdk-arm64/tmp/deploy/ipk/rdk-arm64-oss/Packages

3. Compress the package index:
   $ cd build-rdk-arm64/tmp/deploy/ipk/rdk-arm64-oss/
   $ gzip -c9 Packages > Packages.gz

4. Copy or rsync the IPK feed into a location in the local file system, e.g.:
   Rsyncing from ./build-rdk-arm64/tmp/deploy/ipk/rdk-arm64-oss/* to ${HOME}/community_shared/rdk-arm64-oss/4.6.2-community/ipk/
OSS layer is a common layer and not platform specific. The above-mentioned configuration builds OSS for arm64 machine and can be reused for any platforms with the same configuration.
Step 2. Building the Vendor Layer
$ repo init -u "https://github.com/rdkcentral/vendor-manifest-raspberrypi/" -b refs/tags/RDK7-1.0.0 -m rdke-raspberrypi.xml
$ repo sync

# Setup the IPK feed(s)
# Please note: For local IPK feed in local file system, the "file:/" prefix and the "/" suffix are important.

1. OSS IPK feed:
   Modify this file:
   rdke/common/meta-oss-reference-release/conf/machine/include/oss.inc
   Set `OSS_IPK_SERVER_PATH` to the IPK feed location in the local file system, e.g.:
   OSS_IPK_SERVER_PATH = "file:/${HOME}/community_shared/rdk-arm64-oss/4.6.2-community/ipk/"

$ MACHINE=raspberrypi4-64-rdke source ./scripts/setup-environment
$ echo 'DEPLOY_IPK_FEED = "1"' >> conf/local.conf
$ bitbake lib32-packagegroup-vendor-layer   # to build vendor layer IPK feed
OR
$ bitbake lib32-vendor-test-image           # to build bootable vendor layer test image

# The produced IPK objects:
./build-raspberrypi4-64-rdke/tmp/deploy/ipk/raspberrypi4-64-rdke-vendor/

# Rsync:
Rsyncing from ./build-raspberrypi4-64-rdke/tmp/deploy/ipk/raspberrypi4-64-rdke-vendor/* to ${HOME}/community_shared/raspberrypi4-64-rdke-vendor/RDK7-1.0.0/ipk/
Step 3. Building the Middleware Layer
$ repo init -u "https://github.com/rdkcentral/middleware-manifest-rdke/" -b refs/tags/RDK7-1.0.0 -m raspberrypi4-64.xml
$ repo sync

# Setup the IPK feed(s)
# Please note: "file:/" prefix and "/" suffix are important.

1. OSS IPK feed:
   Modify:
   rdke/common/meta-oss-reference-release/conf/machine/include/oss.inc
   OSS_IPK_SERVER_PATH = "file:/${HOME}/community_shared/rdk-arm64-oss/4.6.2-community/ipk/"

2. Vendor IPK feed:
   Modify:
   rdke/vendor/meta-vendor-release/conf/machine/include/vendor.inc
   VENDOR_IPK_SERVER_PATH = "file:/${HOME}/community_shared/raspberrypi4-64-rdke-vendor/RDK7-1.0.0/ipk/"

$ MACHINE=raspberrypi4-64-rdke source ./scripts/setup-environment
$ echo 'DEPLOY_IPK_FEED = "1"' >> conf/local.conf
$ bitbake lib32-packagegroup-middleware-layer
OR
$ bitbake lib32-middleware-test-image

# IPK output:
./build-raspberrypi4-64-rdke/tmp/deploy/ipk/raspberrypi4-64-rdke-middleware/

# Rsync:
Rsyncing from ./build-raspberrypi4-64-rdke/tmp/deploy/ipk/raspberrypi4-64-rdke-middleware/* to ${HOME}/community_shared/raspberrypi4-64-rdke-middleware/RDK7-1.0.0/ipk/
Step 4. Building the Application Layer
$ repo init -u "https://github.com/rdkcentral/application-manifest-rdke/" -b refs/tags/RDK7-1.0.0 -m raspberrypi4-64.xml
$ repo sync

1. OSS IPK feed:
   Modify:
   rdke/common/meta-oss-reference-release/conf/machine/include/oss.inc
   OSS_IPK_SERVER_PATH = "file:/${HOME}/community_shared/rdk-arm64-oss/4.6.2-community/ipk/"

2. Vendor IPK feed:
   Modify:
   rdke/vendor/meta-vendor-release/conf/machine/include/vendor.inc
   VENDOR_IPK_SERVER_PATH = "file:/${HOME}/community_shared/raspberrypi4-64-rdke-vendor/RDK7-1.0.0/ipk/"

3. Middleware IPK feed:
   Modify:
   rdke/middleware/meta-middleware-release/conf/machine/include/middleware.inc
   MW_IPK_SERVER_PATH = "file:/${HOME}/community_shared/raspberrypi4-64-rdke-middleware/RDK7-1.0.0/ipk/"

$ MACHINE=raspberrypi4-64-rdke source ./scripts/setup-environment
$ echo 'DEPLOY_IPK_FEED = "1"' >> conf/local.conf
$ bitbake lib32-packagegroup-application-layer
OR
$ bitbake lib32-application-test-image

# IPK output:
./build-raspberrypi4-64-rdke/tmp/deploy/ipk/raspberrypi4-64-rdke-application/

# Rsync:
Rsyncing from ./build-raspberrypi4-64-rdke/tmp/deploy/ipk/raspberrypi4-64-rdke-application/* to ${HOME}/community_shared/raspberrypi4-64-rdke-application/RDK7-1.0.0/ipk/
Step 5. Building the Image Assembler or Full Stack Image Layer
$ repo init -u "https://github.com/rdkcentral/image-assembler-manifest-rdke/" -b refs/tags/RDK7-1.0.0 -m raspberrypi4-64.xml
$ repo sync

1. OSS IPK feed:
   Modify:
   rdke/common/meta-oss-reference-release/conf/machine/include/oss.inc
   OSS_IPK_SERVER_PATH = "file:/${HOME}/community_shared/rdk-arm64-oss/4.6.2-community/ipk/"

2. Vendor IPK feed:
   Modify:
   rdke/vendor/meta-vendor-release/conf/machine/include/vendor.inc
   VENDOR_IPK_SERVER_PATH = "file:/${HOME}/community_shared/raspberrypi4-64-rdke-vendor/RDK7-1.0.0/ipk/"

3. Middleware IPK feed:
   Modify:
   rdke/middleware/meta-middleware-release/conf/machine/include/middleware.inc
   MW_IPK_SERVER_PATH = "file:/${HOME}/community_shared/raspberrypi4-64-rdke-middleware/RDK7-1.0.0/ipk/"

4. Application IPK feed:
   Modify:
   rdke/application/meta-application-release/conf/machine/include/application.inc
   APPLICATION_IPK_SERVER_PATH = "file:/${HOME}/community_shared/raspberrypi4-64-rdke-application/RDK7-1.0.0/ipk/"

$ MACHINE=raspberrypi4-64-rdke source ./scripts/setup-environment
$ bitbake lib32-rdk-fullstack-image

# Final flashable image:
./build-raspberrypi4-64-rdke/tmp/deploy/images/raspberrypi4-64-rdke/.wic.bz2
Flashing Instructions
The micro SD card should be formatted before writing the RPI image to it. The minimum SD card size recommended is 8GB. It is preferred to use more (16 or 32 GB) considering the downloadable apps support in RDK. After flashing, remove the SD card and insert it to the Raspberry Pi 4 device’s SD card slot.
Option 1: Using Linux
Using dd on Linux/macOS:
$ bzcat <IMAGE_NAME>.wic.bz2 | sudo dd of=/dev/sdb bs=4M iflag=fullblock oflag=direct conv=fsync
Option 2: Using Windows
Using balenaEtcher:
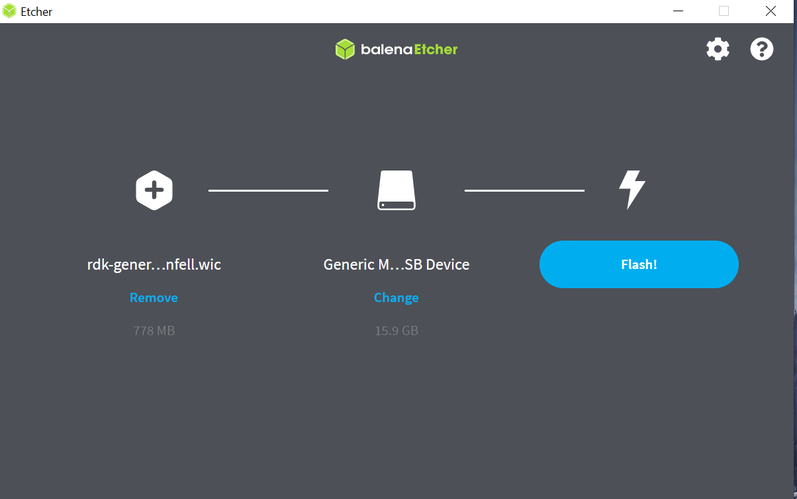
To flash the image on an SD card, you will need to download the balenaEtcher application –
https://www.balena.io/etcher/
Open the application → Select the image from your download folder → Select the drive containing your SD card → Click “Flash” to copy the image onto the SD card.
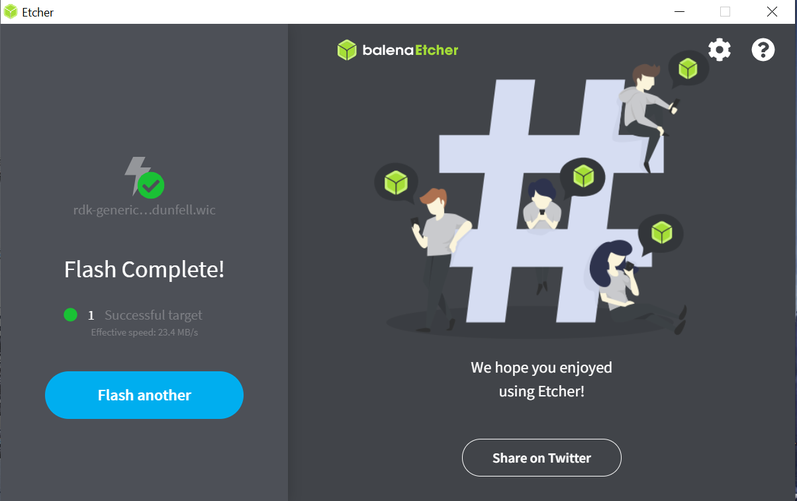
In some cases, we have seen an error where latest versions of BalenaEtcher get stuck at 7% flashing:
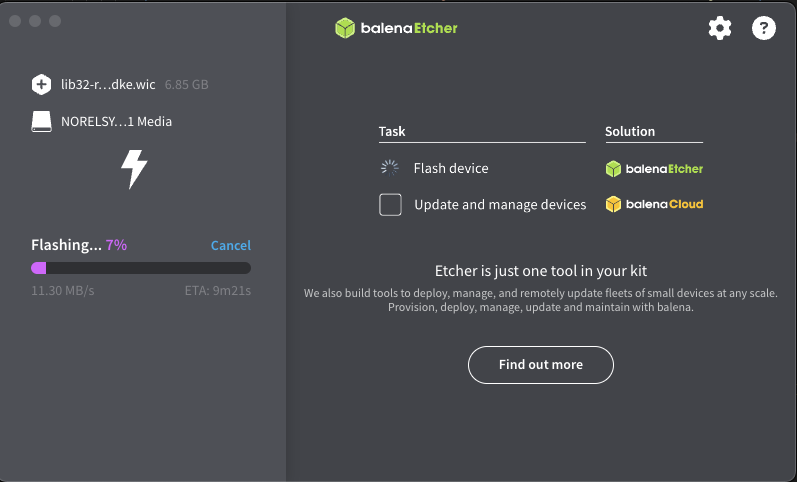
In this case, try downgrading BalenaEtcher version to 1.18.11.
Power on the Raspberry Pi:
- TV screen will display the default RDK UI as shown below.
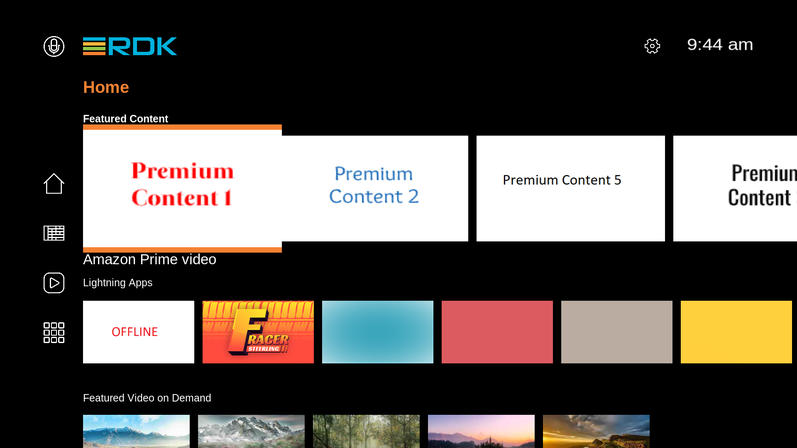
- To view the Raspberry Pi’s IP address (referred to as machineIP from now on), go to ‘Settings → Network Configuration → Network Info → check for “IP Address”‘.
- For ssh, use:
ssh root@<ip-address> - For verifying the image details, use:
cat /version.txt

